


Why Perforated Window Graphics Are Perfect for Your Jeep
Looking for a way to customize your Jeep without compromising visibility? Perforated window graphics are the perfect solution! These durable, high-quality decals allow you to express your personal style while still maintaining clear sightlines from inside your vehicle.
The perforated design provides the added benefit of increased privacy, UV protection, and even brand visibility, making them an ideal choice for Jeep owners. Whether you're aiming to advertise, personalize your ride, or enhance its appearance, perforated window graphics offer a sleek, functional upgrade.
In this step-by-step guide, we'll show you how to easily install perforated window graphics on your Jeep and achieve a professional, custom look right from the comfort of your garage.
Step 1: Gather Your Materials
Before you begin the installation, make sure you have the following materials on hand:
- Perforated Window Graphics: Choose a design that's made specifically for your Jeep model.
- Cleaning Supplies: You'll need isopropyl alcohol, water, microfiber cloths, and a squeegee.
- Measuring Tape: This will ensure precise placement of your graphic.
- Application Fluid: A mixture of water and a small drop of dish soap will help with easy repositioning.
- Utility Knife or Razor Blade: For trimming any excess vinyl along the edges.
Step 2: Clean the Window Surface
Proper cleaning is essential to ensure the graphic adheres securely to the window. Any dirt, grease, or residue could cause the vinyl to peel or bubble.
- Clean the window thoroughly with isopropyl alcohol and a microfiber cloth to remove oils and dirt.
- Rinse the surface with water to remove any remaining cleaning solution or dust.
- Dry the window completely with a dry microfiber cloth to prevent any moisture that could interfere with adhesion.
Step 3: Measure and Position the Decal
Now that your window is clean, it's time to position the graphic.
- Use a measuring tape to find the exact center of the window. Mark it lightly with a pencil to help align the graphic properly.
- Position the graphic temporarily using masking tape. This gives you a chance to double-check the fit and make sure the design is centered.
- Align the graphic evenly along the edges for a clean, symmetrical appearance.
Step 4: Apply the Decal
Once you're satisfied with the positioning, it's time to apply the graphic.
- Mist the window lightly with your application fluid. This helps ensure the graphic doesn't stick too quickly, giving you room for adjustment.
- Peel the backing from the perforated vinyl and carefully begin applying it, starting from one edge and working across the window.
- Use a squeegee to smooth the graphic down from the center outward. This will help remove any air bubbles.
- Press gently but firmly to ensure the decal adheres securely to all areas of the window.
Step 5: Trim Excess Vinyl
After applying the graphic, you'll need to trim the edges for a perfect fit.
- Use a utility knife or razor blade to carefully trim the excess vinyl around the edges of the window. Follow the natural contour of the window for a clean, straight cut.
- Smooth the edges with the squeegee to ensure that the graphic stays securely in place.
Step 6: Final Inspection and Curing Time
After installation, it's important to give the decal time to set.
- Inspect the graphic for any air bubbles, wrinkles, or misalignments. Use a squeegee to remove any remaining bubbles.
- Allow the decal to cure for 24 to 48 hours to ensure the adhesive bonds properly. During this time, avoid rolling down the windows or exposing the vehicle to extreme weather conditions.
Troubleshooting Tips
- Air Bubbles: If you notice any bubbles, use a squeegee to push them towards the edge. For stubborn bubbles, gently puncture them with a pin and smooth the area out.
- Misalignment: If the graphic is slightly misaligned, carefully peel it off and reposition it while the application fluid is still wet.
- Wrinkles: If wrinkles appear, gently lift the graphic and smooth it out with the squeegee. If the vinyl has dried, lightly mist the surface with water to make repositioning easier.
Benefits of Perforated Window Graphics for Your Jeep
Installing perforated window graphics on your Jeep not only enhances its appearance but also provides practical benefits:
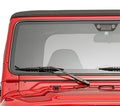
- Increased Privacy: The perforated design prevents outsiders from seeing inside while still allowing full visibility from the driver's seat.
- UV Protection: Protect your Jeep's interior from sun damage and keep your vehicle cooler in hot weather.
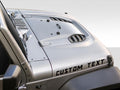
- Enhanced Style: Custom graphics are a great way to show off your personality, brand, or patriotism.
Make Your Jeep Stand Out with Perforated Window Graphics
Installing perforated window graphics on your Jeep is an easy and effective way to give your vehicle a custom look. With the simple steps outlined in this guide, you can achieve a professional result right from your own garage. Not only will these graphics enhance the appearance of your Jeep, but they'll also provide added privacy, UV protection, and personalization.
Ready to personalize your Jeep with perforated window graphics? Browse our collection of window graphics today and get started on your installation project!
0 comments